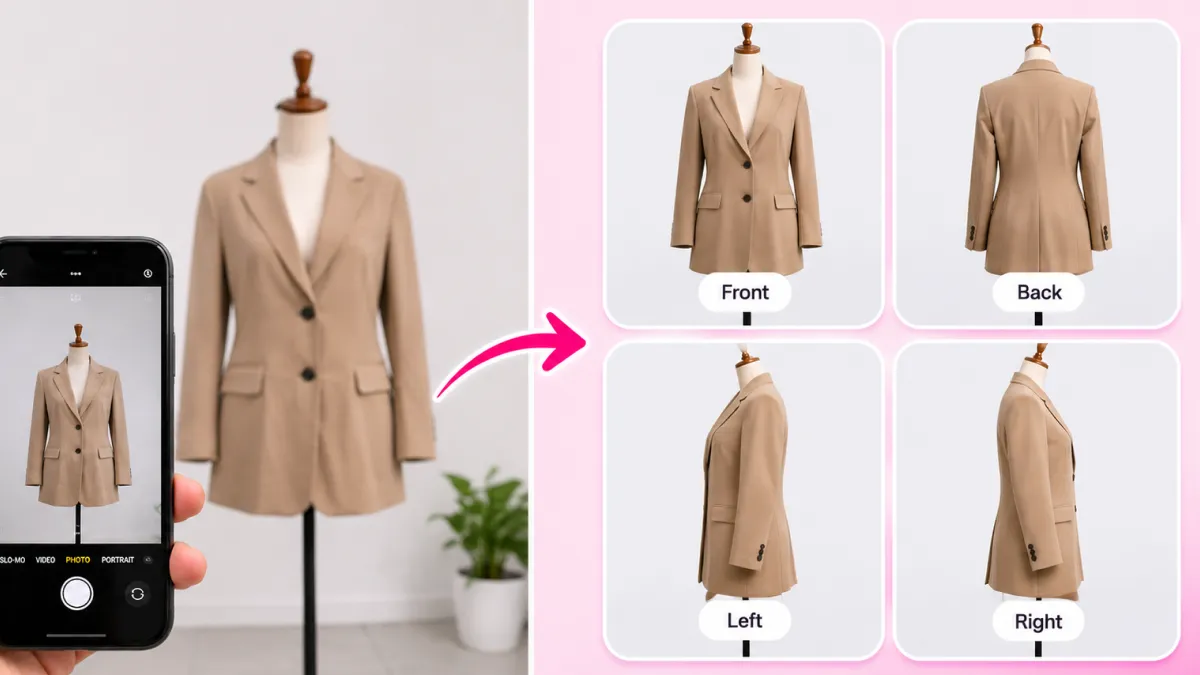
I get asked this question almost every single week by founders launching their first Shopify store: *'Do I need to hire a commercial photographer, or can I just use my phone?'*
Here is the honest truth: you don't need a $3,500 Sony camera, a messy pile of studio cables, or a photography degree. If you own an iPhone 12 Pro or newer, you are already walking around with a camera capable of capturing crisp, retail-ready imagery that can compete with brands like Glossier, Nike, or Allbirds.
So why do so many DIY phone photos look cheap, blurry, and amateurish?
It isn't your phone's camera sensor. It is usually three or four annoying default settings that Apple turns on out of the box, combined with bad indoor lighting and the fact that nobody ever showed you the $2 foam board trick.
In this guide, I'm going to walk you through the exact setup I use - from camera settings and free window lighting to fixing backgrounds and adding realistic shadows with AI. No technical photography fluff. Just real, practical advice you can test on your dining table in 15 minutes.
The 4 Default iPhone Camera Settings That Are Quietly Ruining Your Photos
Before you place your product on a table, pull out your iPhone, open Settings > Camera, and fix these four default settings. Making these tweaks takes less than 60 seconds, but it will instantly double your photo quality:
1. Stop Shooting at 1x Close-Up (The 'Fishbowl Bulge' Trap)
Here is what almost everyone does wrong: they put a bottle on their desk, lean in close with their phone on the default 1x lens, and snap a picture. What happens? The center of the bottle bulges outward and the edges curve away like a fishbowl. Why? Because your phone's 1x lens is a wide-angle lens (around 24mm equivalent), designed for landscapes and group selfies, not products. What to do instead: Step back 3 to 4 feet and tap the 2x or 3x optical zoom button. Notice the difference immediately: lines stay straight, proportions look natural, and the bottle looks sleek and realistic.
2. Lock Your Focus and Pull Down the Highlights (-0.5 EV)
Ever notice how white labels, silver caps, or gold lettering turn into blinding white blobs in phone photos? That is Apple's auto-exposure trying to brighten the whole room. To fix this: tap and hold your finger on the product label until the yellow square locks and says 'AE/AF LOCK'. Then slide your finger downward next to the little sun icon to make the image slightly darker than you think it needs to be. Keeping the highlights under control preserves every tiny letter and logo on your packaging. You can easily brighten shadows later, but once highlights blow out to pure white, that detail is gone forever.
3. Turn Off the Flash (Seriously, Never Use It)
If you take only one piece of advice from this entire article, let it be this: never use your phone's built-in flash for product photos. On-camera flash is like shining a harsh flashlight in someone's eyes at 2 AM. It flattens all depth, creates blinding white glare spots on plastic and glass, and casts ugly, muddy black shadows behind your product.
4. Turn ON the Camera Grid Overlay
Go to Settings > Camera > Grid and toggle it ON. This overlays simple rule-of-thirds lines on your screen. It sounds basic, but keeping your product dead-center and making sure your table horizon line is completely level separates professional product pages from sloppy hobby stores.
Two Tiny Physical Habits That Save 90% of Phone Photos
Before we talk about lighting, there are two physical habits that take five seconds but eliminate the most common reasons phone photos look amateurish:
The two-minute pre-shoot checklist:
- Wipe the camera lens with your shirt or a microfiber cloth: Your phone lives in your pocket, on dirty desks, and touches oily fingers all day. That foggy, glowing haze around your product lights isn't an artistic filter, it's fingerprint grease on the glass. Give the camera lenses a solid wipe before shooting.
- Use the 2-second camera timer (kill the micro-shake): When you tap your phone screen to take a picture, the physical tap vibrates the phone just enough to blur fine label typography. Put your phone on a cheap $15 desk tripod, set the timer to 2 seconds, and tap the shutter. Your hands will be completely off the phone when the camera exposes, giving you pin-sharp focus.
The $0 DIY Home Studio: Free Window Daylight + A $2 Foam Board
Please don't rush off to Amazon to buy those cheap $70 ring lights or flimsy softboxes that wobble on cheap plastic legs. The best light source in the world is completely free, and it is probably sitting five feet away from you: natural indirect window daylight.
Here is how to set up a professional lighting station on your kitchen table in two minutes:
Step 1: Find a Window with Indirect Light
Find a window where sunlight is coming into the room, but NOT shining direct, blinding sunbeams onto your table. North-facing or east-facing windows are ideal. Direct sunlight creates harsh, contrasty black shadows; indirect daylight acts like a massive 6-foot studio softbox.
Step 2: Position Your Product at a 45-Degree Angle
Place your table about 3 feet from the window. Set your product down so the window light hits it from the side at roughly a 45-degree angle. This creates natural, gentle depth across the contours of your packaging.
Step 3: The $2 White Foam Board Bounce Trick
Notice how the side of the product facing away from the window looks a bit dark? Go to any dollar store, grocery store, or stationer and buy a piece of white foam poster board for two dollars. Prop it up upright on the dark side of your product. Watch what happens: the white board bounces the window light straight back into the shadows like an invisible photo assistant holding a professional reflector. Suddenly, both sides of your product are evenly, beautifully illuminated.
The Background Problem: Why Cheap Cutouts Look Fake (And How to Fix Them)
Now you have a sharp, well-lit iPhone photo on your camera roll. What next?
If you use a free background removal app and slap your cutout onto pure white with a blurry black circle underneath, it immediately looks like a 2005 eBay listing. It looks disconnected. It looks like a flat sticker floating in cyberspace.
Why does your brain reject it? Because in the real world, objects have physical weight and mass. When an object sits on a surface, two things happen with light:
1. The Contact Umbra: A razor-thin, pitch-black line directly under the base where the product touches the floor. Light simply cannot squeeze into that gap.
2. The Ambient Penumbra: A soft, natural shadow gradient that gently fades outward depending on where the light is coming from.
This is where modern e-commerce AI actually makes sense. Instead of spending 45 minutes manually drawing paths in Photoshop or paying a freelancer on Fiverr who uses a blurry brush tool, you drop your raw iPhone photo into SocialShot AI Studio. It locks your real product label with zero distortion, removes your messy background, and generates real 3D lighting, travertine stone plinths, or studio marble underneath your product in seconds.
The Math: DIY iPhone + SocialShot vs. The Old Photography Way
Let's look at the actual time and financial cost of shooting a 10-product collection across the traditional studio route, hiring freelance retouchers, and doing it with your iPhone and SocialShot:
| Method | Real Cost (10 Products) | Turnaround Time | Equipment Needed | Shadow Realism | Shopify Store Sync |
|---|---|---|---|---|---|
| Local Photo Studio | $1,500 – $3,500 | 2 to 3 Weeks | Professional Camera & Lights | Physical Studio Lights | Manual Downloads |
| Freelance Retoucher (Fiverr) | $150 – $300 | 4 to 7 Days | Photoshop License | Flat 2D Drop Shadow | Manual Uploading |
| iPhone + SocialShot AI Studio | Under $15 (AI Credits) | 10 to 15 Minutes | Your Phone + $2 Foam Board | Physics-Accurate Ray Tracing | Direct 1-Click Sync to PDP |
The 5 Angles Every High-Converting Shopify Product Page Needs
Don't just upload one photo and call it a day. High-converting Shopify stores follow a simple 5-photo storytelling sequence that answers every buyer doubt:
1. The Clean Hero White Shot (Image 1)
Straight-on eye-level view on pure white (#FFFFFF) with a clean contact shadow. This is what Google Shopping and Amazon require for ads, and it gives shoppers an instant, clear first impression.
2. The Luxury Pedestal Shot (Image 2)
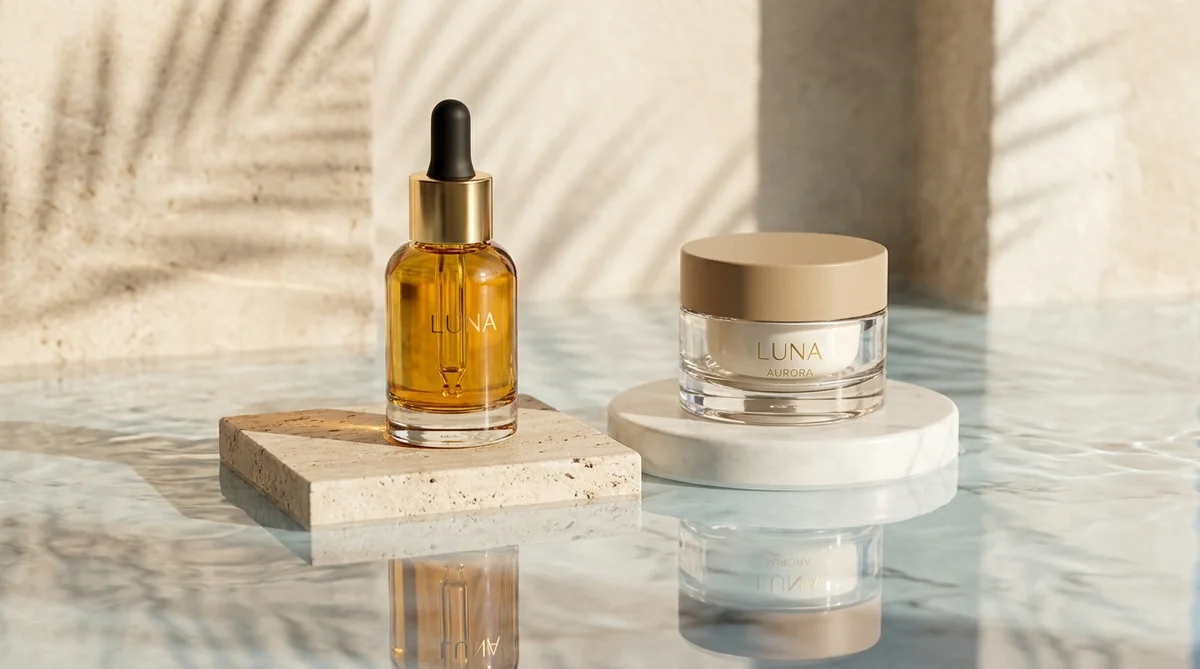
Staged on a natural travertine, limestone, or marble block. It immediately elevates perceived value, making a $20 product look like an $80 luxury boutique item.
3. The 'In the Hand' Scale Reference (Image 3)
The number one reason people return products is size confusion. Showing the product held in a human hand gives immediate scale so buyers know exactly what size to expect when the box arrives.
4. The Macro Texture & Detail Close-Up (Image 4)
Zoom in on your pump nozzle, the stitching on your fabric, or the texture of your cream. High-resolution detail shots prove authentic quality and validate higher price points.
5. The Lifestyle Setting (Image 5)
Place the product in its natural home: on a sunlit bathroom vanity, an organized desk, or a kitchen counter. This lets shoppers visualize how great it will look in their own home.
Real Story: How a Kitchen Table Brand Saved $3,200 on Their First Launch
A friend of mine who launched an independent organic skincare brand on Shopify was quoted $3,200 by a local commercial photography studio to shoot 6 serum bottles. For a brand new founder bootstrap-funding inventory, that was almost half their launch budget.
Instead of blowing their capital on studio fees, we set up a folding table next to their living room window on a bright Sunday morning. We grabbed a white foam board, locked the iPhone 14 Pro at 2x zoom, and shot all 6 bottles in about 45 minutes.
We ran the raw phone snaps through SocialShot AI Studio on Shopify. In less than an hour, we had pure white Amazon-compliant hero shots, gorgeous beige travertine plinths, and realistic on-hand scale shots live on their Shopify store.
The total bill? About $18 in generation credits. The collection sold out in their first two weeks, and not a single customer ever suspected the photos were shot on a dining table with an iPhone.
How to Shoot Your First Product in 4 Simple Steps
Here is your exact, no-fluff action checklist to get studio-grade product photos today:
Wipe Lens & Set Up Your Table
Wipe your iPhone camera lens with a clean microfiber cloth. Set up your product on a clean table 3 feet from an indirect window, with a white foam poster board propped on the opposite side.
Back Up 4 Feet and Tap 2x Zoom
Do not stand on top of your product on 1x zoom. Step back 4 feet, switch to 2x or 3x optical telephoto zoom, tap and hold on the center label to lock exposure, drag the sun slider down slightly, and snap with a 2-second timer.
Upload to SocialShot AI Studio
Drop your raw phone photo into SocialShot AI Studio on Shopify. The AI isolates your product with sub-pixel edge detection, keeping your text, labels, and logos 100% untouched while rendering realistic studio lighting.
Pick Your Presets and Push to Shopify
Select your desired studio setups - pure hero white, travertine stone, or lifestyle settings. Hit 'Push to Shopify Gallery' and your live product page updates instantly.
Frequently Asked Questions
Can customers tell that my product photos were shot on an iPhone?
Not at all. Modern iPhone sensors capture up to 48 megapixels of clean optical detail. When you shoot at 2x optical zoom with good window light and let SocialShot handle commercial studio lighting and backgrounds, your images look identical to shoots done with high-end commercial cameras.
Why do my photos look yellow or orange when I shoot indoors?
That is caused by indoor household light bulbs (tungsten bulbs). They cast an unnatural warm yellow/orange glow that ruins product colors. Turn off all room ceiling lights and shoot exclusively using natural daylight from your window.
Do I need the latest iPhone Pro Max, or will an older iPhone work?
Any iPhone from the iPhone 11 onwards works great. iPhone 12 Pro, 13 Pro, 14 Pro, 15 Pro, and 16 models are particularly good because their dedicated 2x and 3x telephoto lenses produce pin-sharp results without any digital grain.
What if my hands are shaky when taking photos?
Get an inexpensive $15 desktop tripod from Amazon. Set your phone on the tripod and turn on the 2-second camera timer. That way, your hand isn't even touching the phone when the picture is taken, completely eliminating camera shake.
Will AI distort or mess up the words on my product label?
Generic art generators like Midjourney will scramble text. But SocialShot features Strict Product Preservation, it isolates and freezes your exact original product pixels, ensuring that logos, barcodes, and fine ingredient text stay 100% crisp and readable.
Does this work for Android phones as well?
Yes! The exact same principles apply to Samsung Galaxy, Google Pixel, and other Android smartphones. Just use the 2x or 3x optical telephoto lens, bounce window light with white foam board, and avoid using the flash.
Final Thoughts
At the end of the day, running a profitable e-commerce brand is about resourcefulness, not blowing your hard-earned cash on studio rentals before you have consistent sales.
By following the 2x zoom rule, using free window daylight, and letting SocialShot handle commercial lighting and backgrounds, you can create a world-class catalog from your living room for less than the price of a cup of coffee.
Pick up your phone, wipe the lens, and test your first product today: install SocialShot AI Studio on Shopify or try our free AI product photo generator.
Explore Free Creative AI Tools on SocialShot
Boost your store conversions with our free browser-based tools:
Free AI Product Photography
Studio-grade product shots with 23+ camera angles, marble pedestals, and natural lighting.
Free AI Shadow Maker
Generate physics-accurate contact and drop shadows for transparent product cutouts.
Free AI Pose Changer
Turn 1 fashion photo into 100+ high-fashion poses and multi-angle catalog lookbooks.
AI Fashion Model Generator
Dress diverse, photorealistic AI fashion models with zero expensive photoshoots.